
Writing the first Jekyll post
In the previous post, I walked you through step-by-step on how to set up a personal blog on Github pages using the Jekyll Chirpy theme.
Here, I will guide you on adding content to your blog. I will only give you the bear minimum you need to know to write your first post. However, you can refer to Chirpy’s guide and learn how to customize your posts as per your needs.
Also, as promised, I will include a troubleshooting section where I will guide you on what to do if your posts fail to reflect on the browser.
We will cover the following:
Timezone
Naming Convention
Front Matter
Categories and tags
Adding images
Adding URLS
Troubleshooting
Ready? Let’s go
Timezone
Before we even create the first post, we need to configure our timezone in the _config.yml file. This will ensure the release date/time of our posts is accurate.
Open the _config.yml file and locate the timezone field. In my case, I’ll use Africa/Nairobi. This should apply for anyone in Kenya.
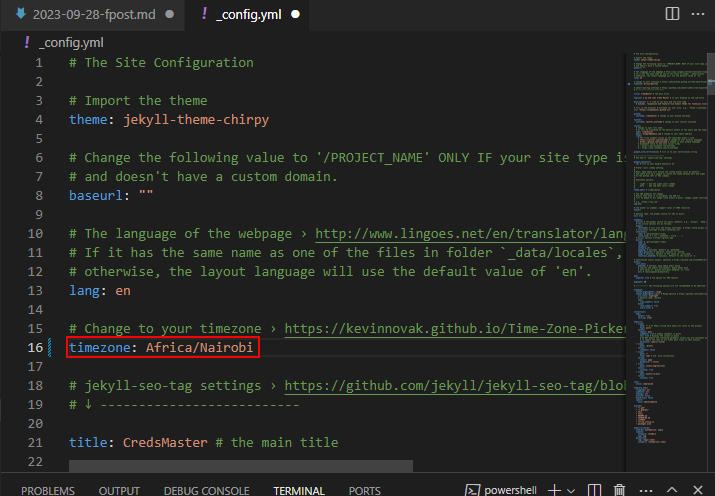 figure a
Naming Convention
When creating a post, you should name it following the syntax YYYY-MM-DD-Title.md
Note the extension must be either .md or .markdown.
On the left navigation bar, click on posts then click on the icon for creating a new file. Proceed to name your file using the syntax above. See figure b below
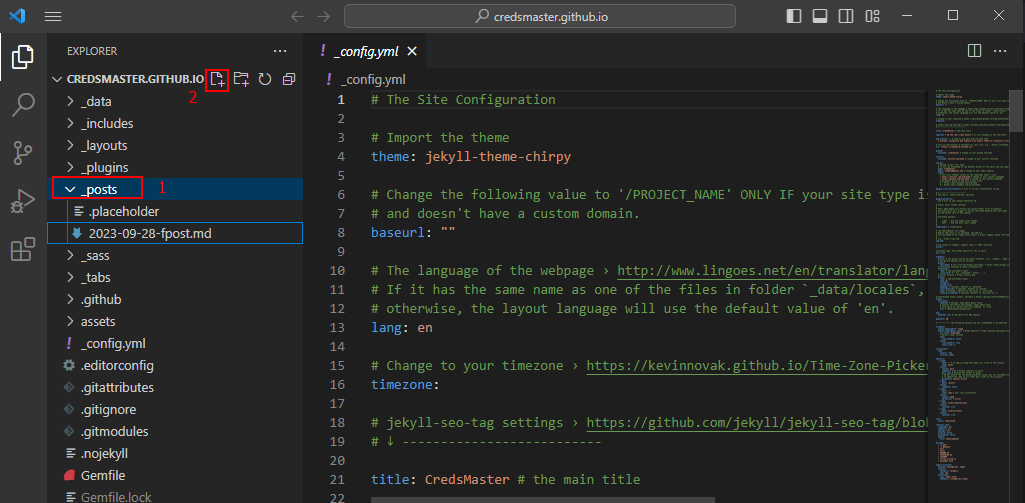 figure b
Front Matter and Headings
For every new post, you have to include the front matter. What? I mean this :point_down:
---
title: TITLE
date: YYYY-MM-DD HH:MM:SS +/-TTTT
categories: [TOP_CATEGORIE, SUB_CATEGORIE]
tags: [TAG]     # TAG names should always be lowercase
---
Use the pound sign for headings. i.e.
#Heading one
##Heading two
###Heading three
####Heading four
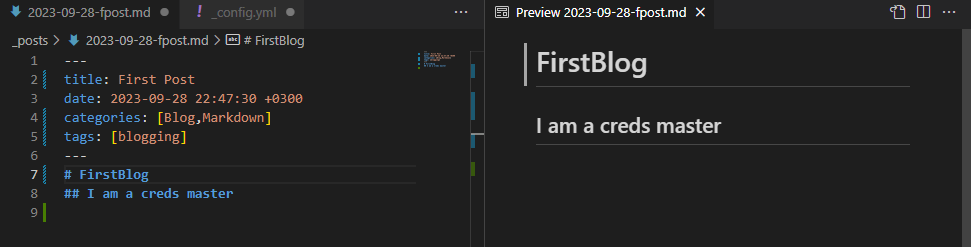 figure c
Categories and tags
Categories will help you organize and categorize your posts making navigation easier.
Tags on the other hand highlight the keywords or topics relevant to the particular post.
When using the Jekyll’s chirpy theme, you can have up to two categories and as many tags as possible.
Example
1
2
3
4
---
categories: [Laptops, Mobile Phones]
tags: [hp, dell, lenovo, samsung, oppo, iphone] #tags should be in lowercase
---
Adding Images
Adding images can enhance the effectiveness of the content in your posts. It makes it easier to visually show what you explain.
To add an image, follow the syntax:
1

Adding URLS
In chirpy theme, you need to follow a certain syntax to make urls clickable. For example, https://www.google.com/ is not clickable but https://www.google.com/ is.
Syntax:
1
[Google](https://www.google.com/)
Summary
In this post, I walked you through on how to have a basic blog post on your blog site. This was very basic and there is more to learn. This will be your assignment.
Troubleshooting
Even though writing a post is a straight forward process, errors may arise, especially if it is the first time. The good thing is that there’s a fix for every problem.
The very common problem is like the one below.
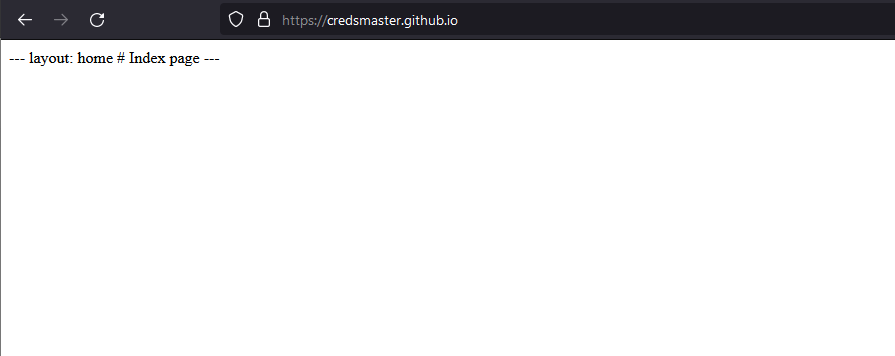
To solve this, sign in to your Github account and click on the settings gear.
It will open up the settings page.
On the left navigation bar, select pages
Under Build and deployment, set the Source to be Github Actions. Reload your Github page and it should work 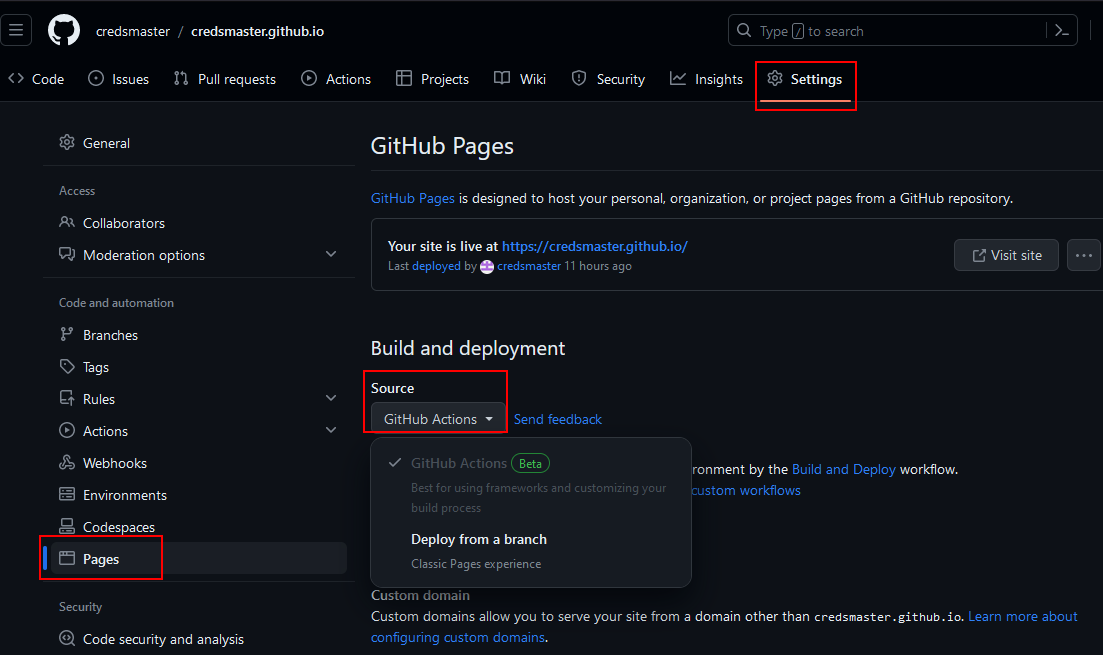
That’s it for now. I hope you found this helpful.
Incase you need some more help, reach out to me on X or LinkedIn