
Installing Active Directory Forest
The first thing that comes up when we boot our server is the server manager. From here we are able to perform multiple administration tasks and setups.
Let us install our active directory forest. First, click on Add roles and Features 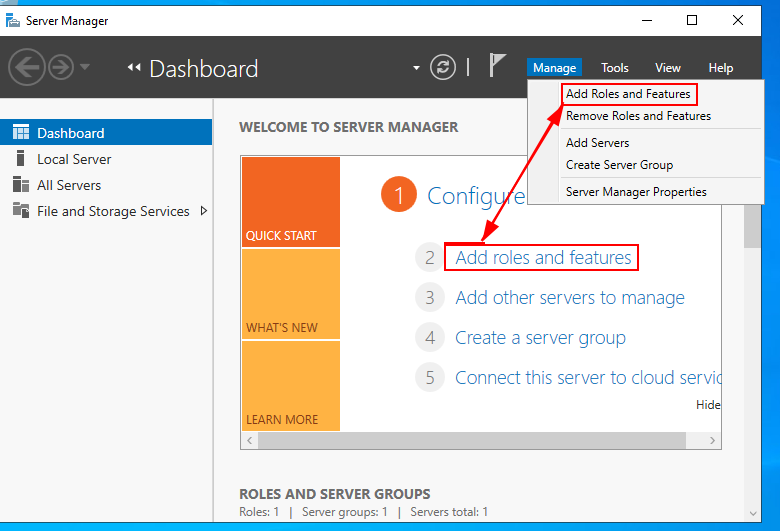
Read the instructions under Before you begin section then proceed to Installation type. Here, we need a Role-based or feature-based installations 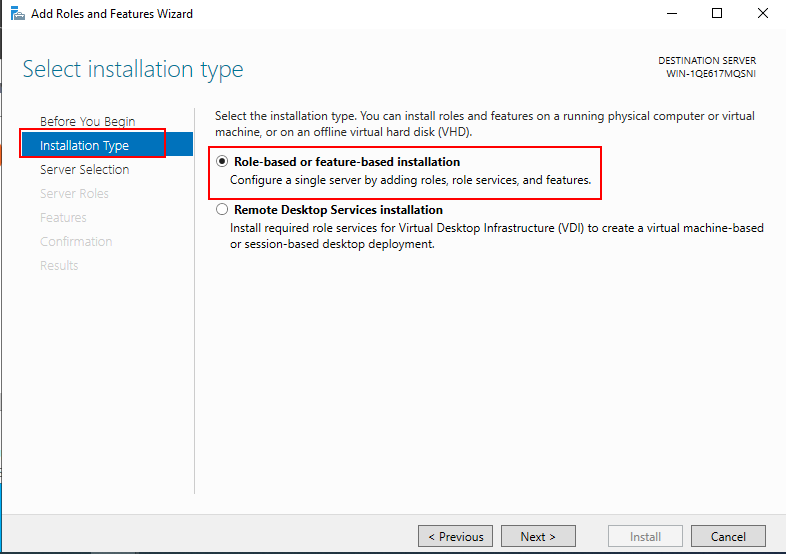
Next confirm that the IP address corresponds to the static IP assigned earlier. 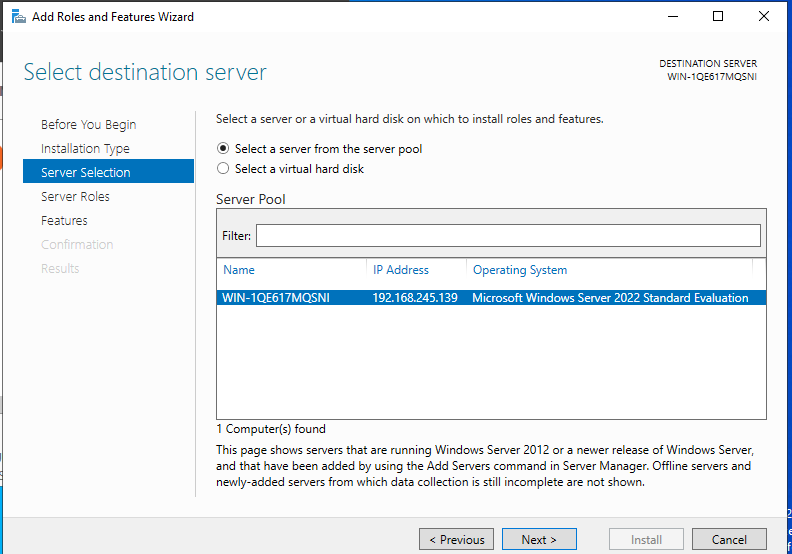
In the Server Roles section, click to check the Active Directory Domain Service checkbox. The pop-up that appears shows the features that are required for Active Directory Domain Services. Click Add Features. 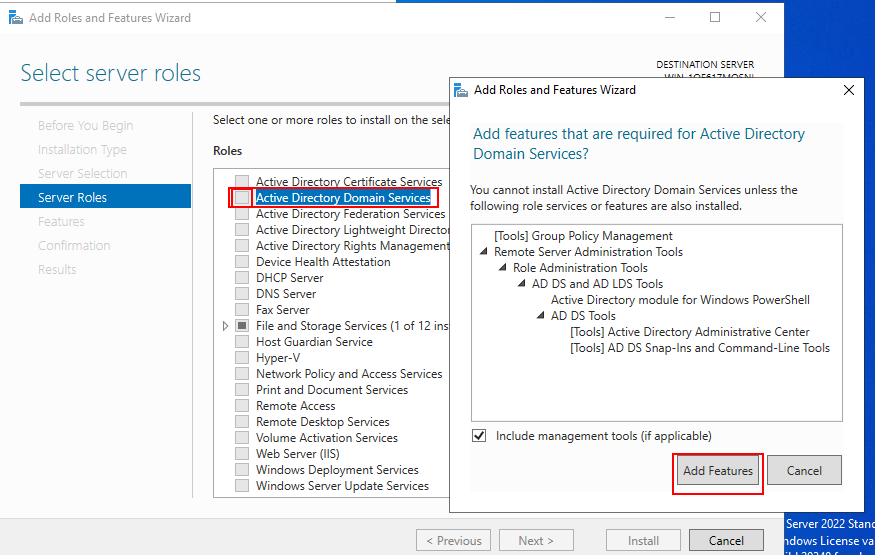
On the next window, select the features that will be installed. For this setup, we will go with the default selection. 
Continue and click Next 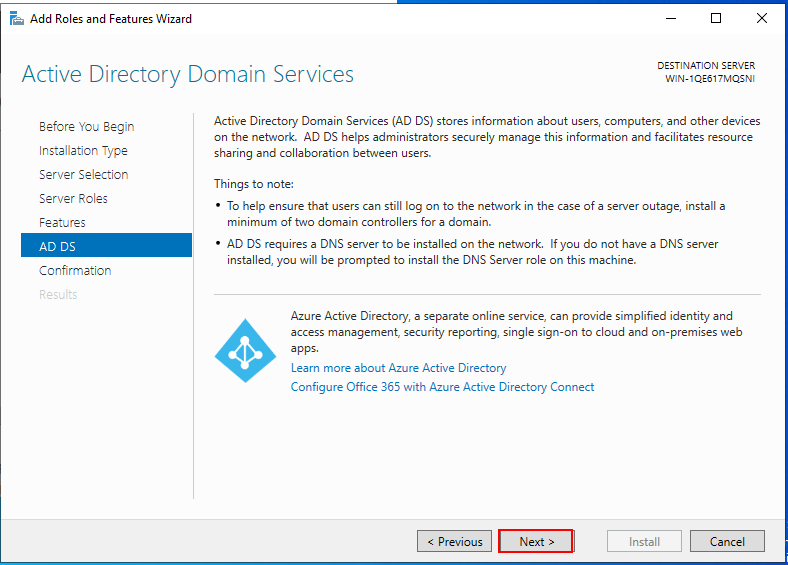
Confirm the selected settings and features and click Install 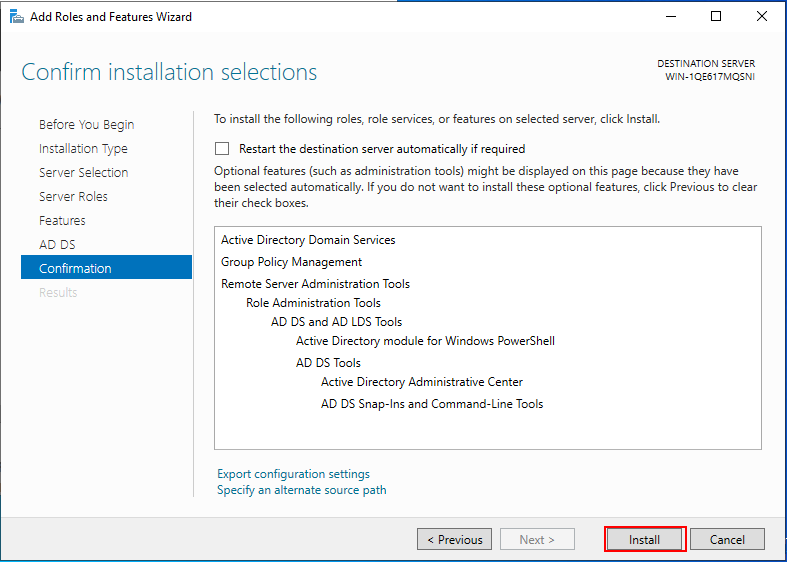
After a short while, the installation will be complete and a message for us that ‘Configuration is required’. Hit close 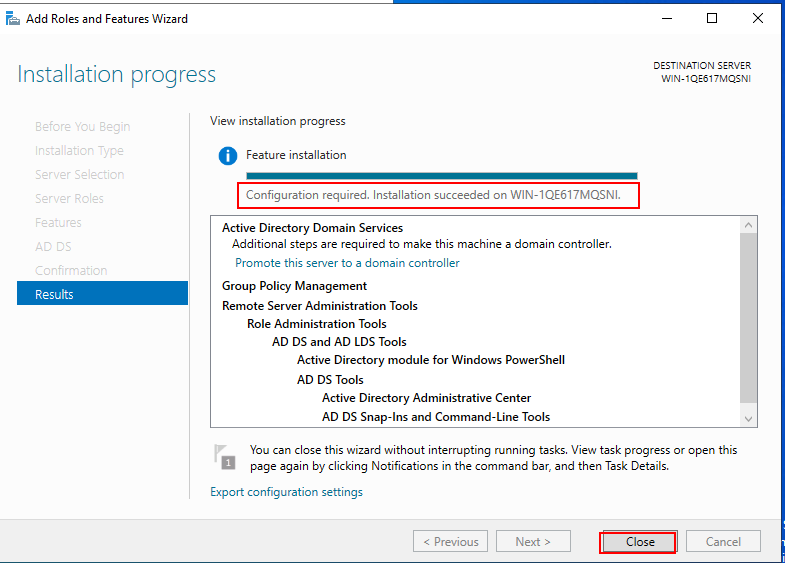
In the next window, we can see a warning sign. Click on it and select Promote this server to a domain controller. 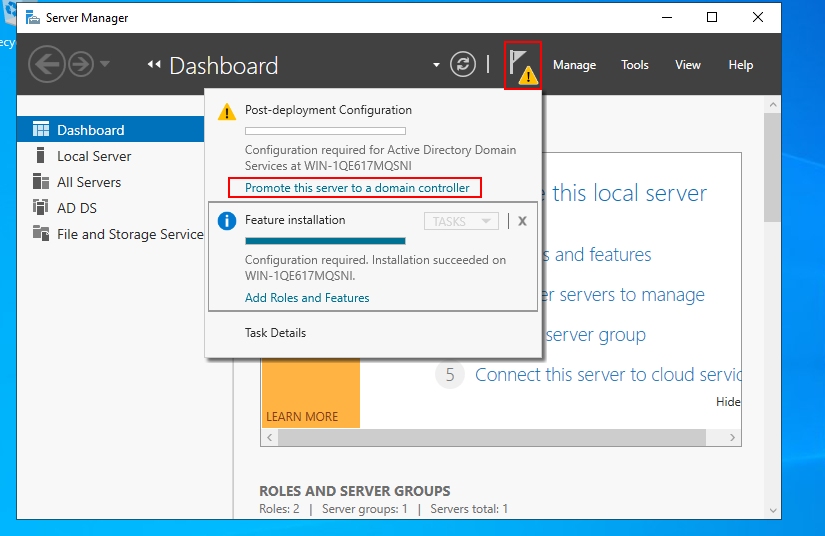
It is at this poit where we add a new forest. If a forest already exists, you can either add a domain controller to an existing domain or add it to an existing forest.
After checking the Add a new forest radio button, go on and supply a root domain name. NOTE The root domain name cannot be changed afterwards. Ensure you give a domain name that is publicly available. 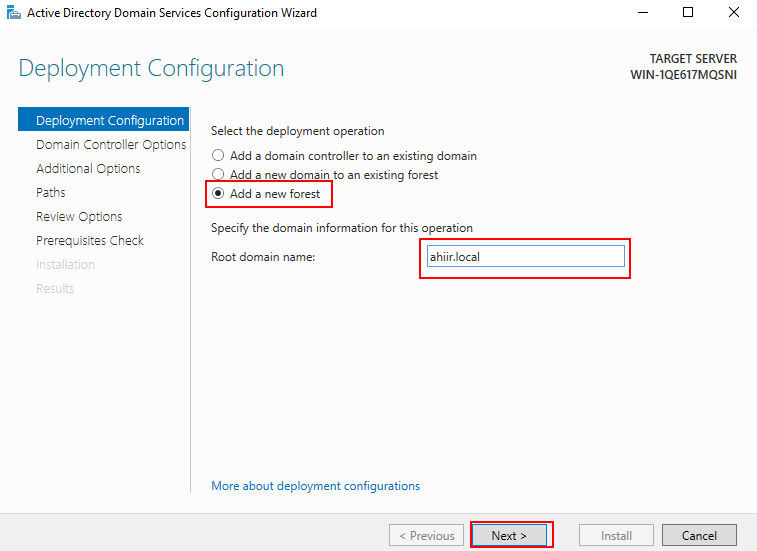
In the next window, select the highest forest functional level. As per now, we go with Windows server 2016. Ensure that the DNS checkbox is checked. 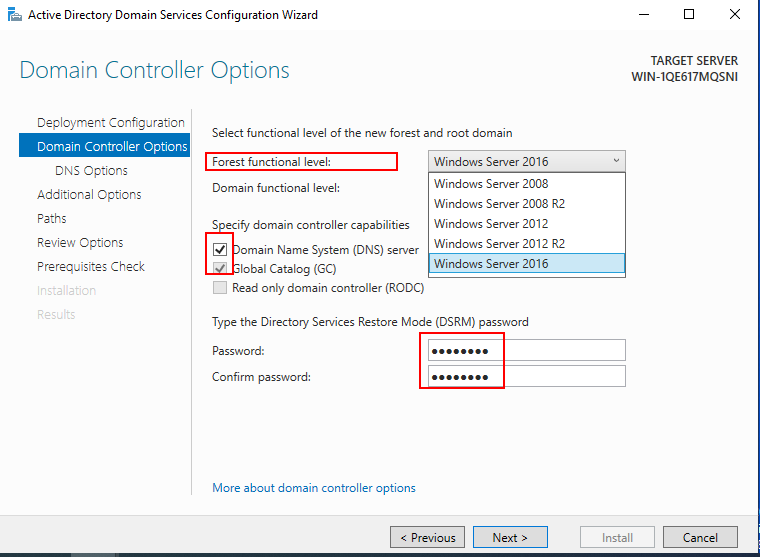
Ignore the error that shows up and click next. 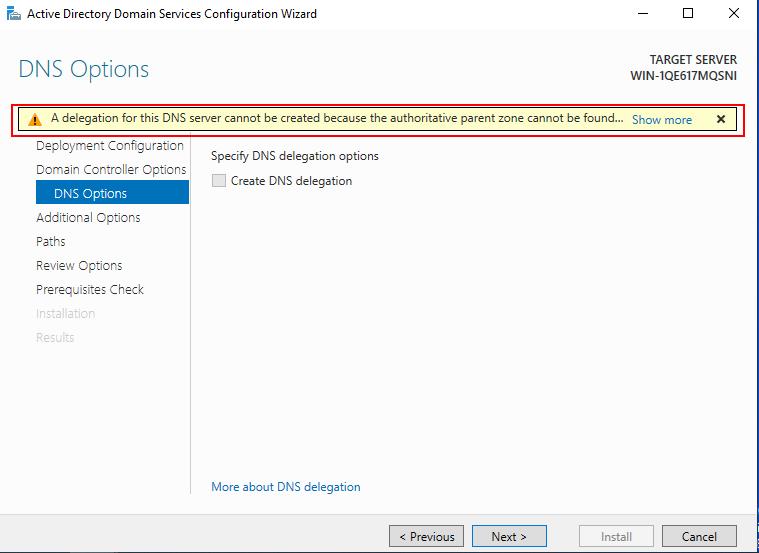
The Netbios name will automatically be picked from the root domain name. It is a good practice to maintain it as so to avoid conflict. 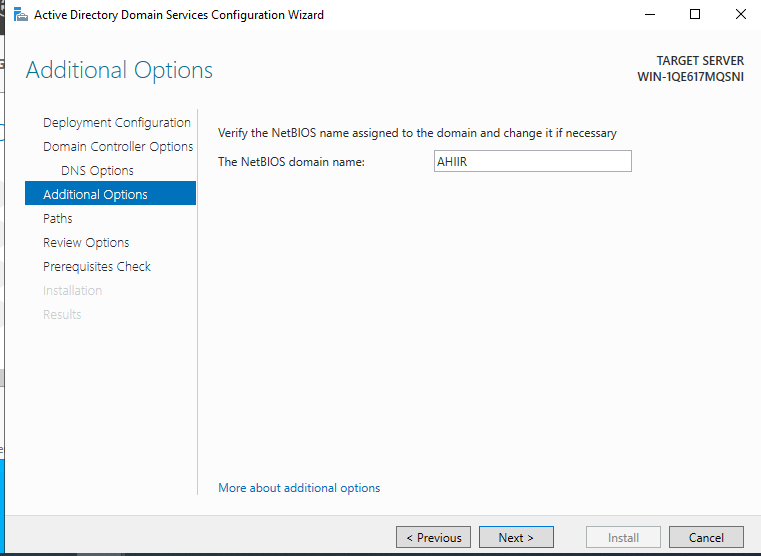
Select the preferred database and log file storage location. 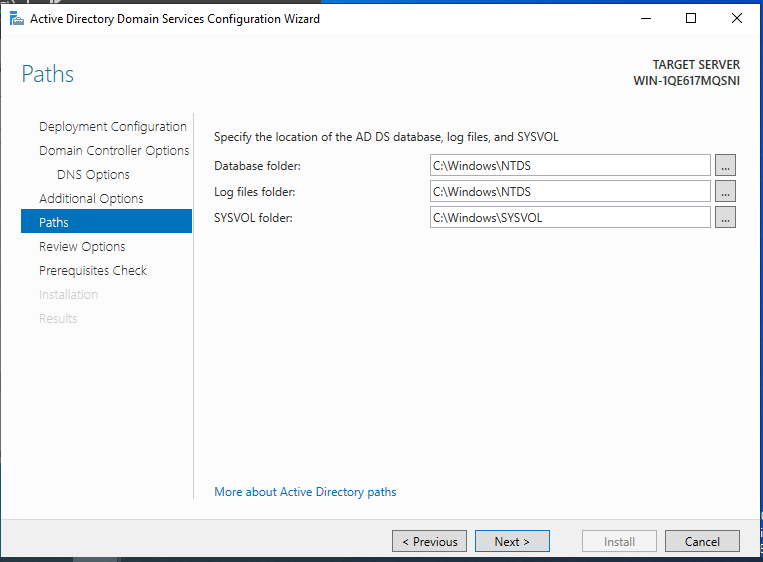
Review your selections and proceed to the next section. 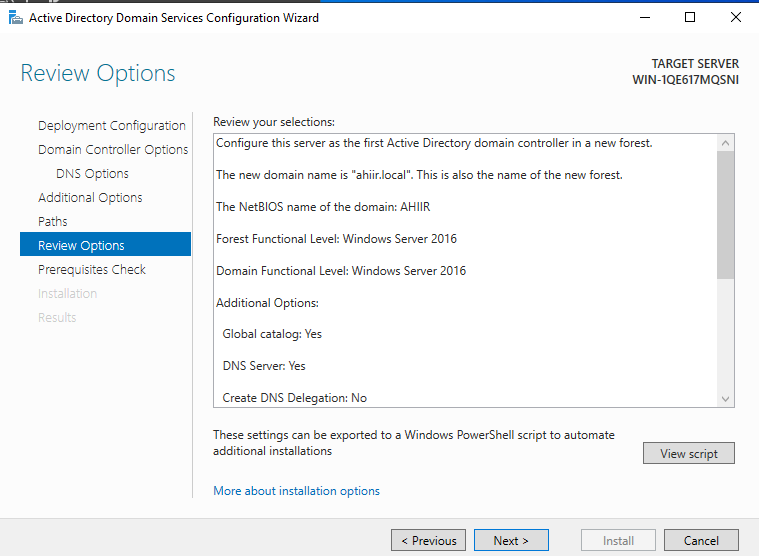
We get a confirmation that all prerequisites checks are passed. Now all that is left is installation. Hit the Install button. 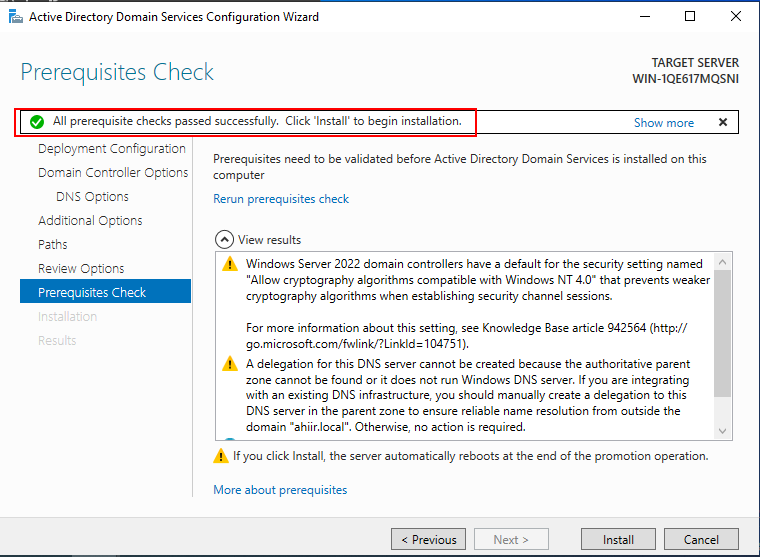
After the installation, the server will automatically restart and we notice that the username has the dommain name. 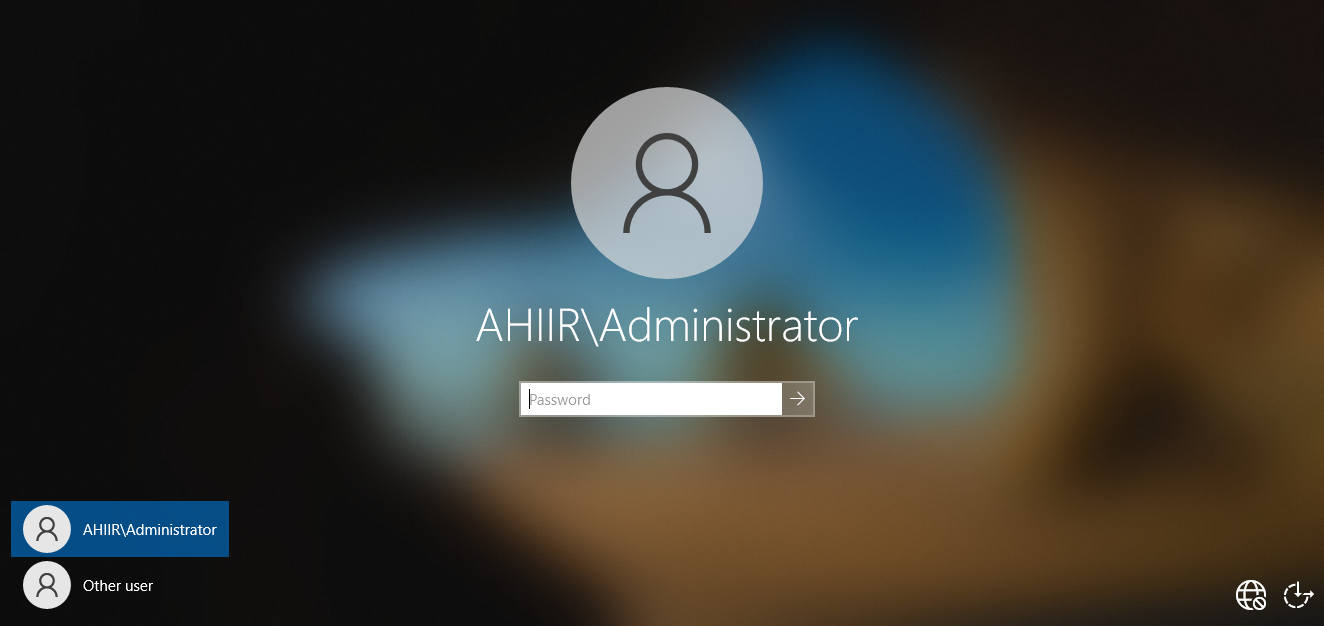
From the server manager, click on the Tools menu, from the dropdown, select Active Directory Users and Computers 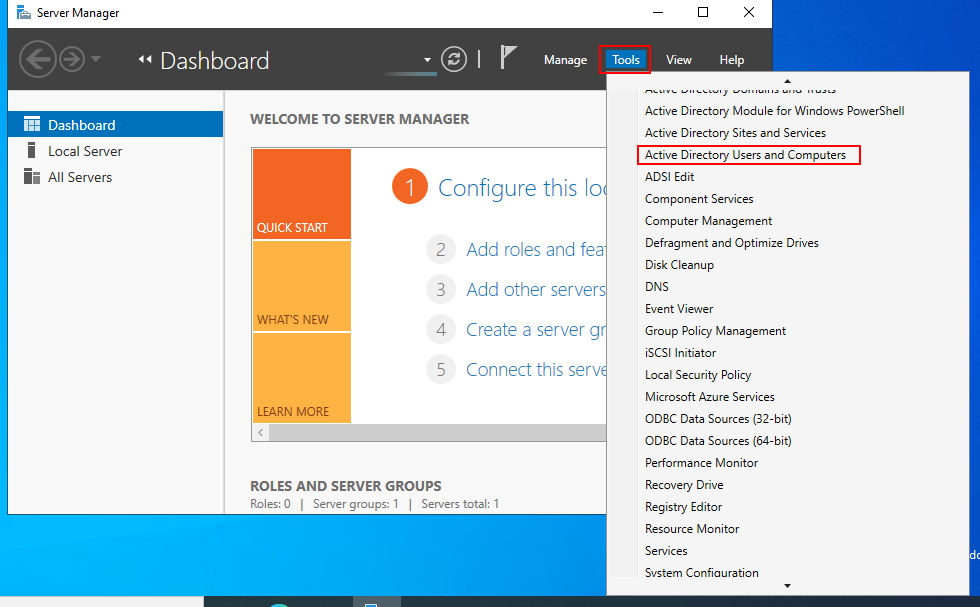
Our forest is ready with the default OUs. 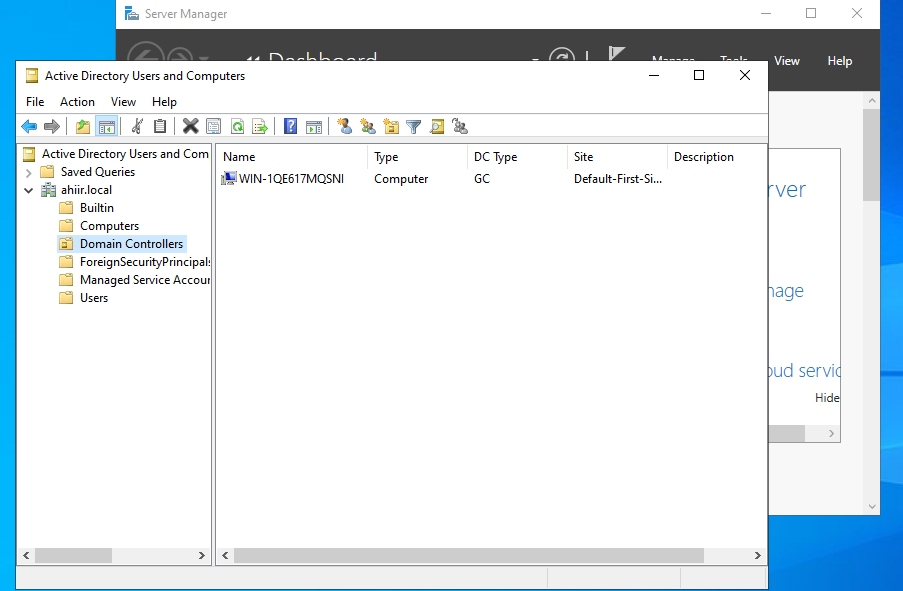
Summary
In this article, we covered how to install an Active Directory Forest step-by-step.
That was a success. In the coming articles, I will publish amazing content about how to perform other setups while also create some users and join some computers to the domain.